How to use Robolytix with WinAutomation
Robolytix is the key online analytic and monitoring tool for Robotic Process Automation using Sonar technology to evaluate, audit, monitor, and improve the performance of robots operating on any application or RPA platform. This tutorial will guide you to analyze your processes in WinAutomation.
WinAutomation is a windows based desktop automation software, with expanded capabilities for application control, improved automation workload efficiency, and increased security.
WinAutomation can automate simple administrative tasks, involving simple data transfer between systems, to complex business processes and workflows. It interacts with any Desktop or Web Applications. You can develop from scratch with the drag-and-drop user interface, or use the Macro Recorder and Web Recorder to automate workflows
Prerequisites
To use Robolytix with WinAutomation, it is necessary to have a Robolytix account. If you do not have one, you can create the account at Robolytix.com and make basic settings using the onboarding wizard.
Use Robolytix functions
We have prepared functions containing Robolytix Sonar logic. This Robolytix Sonar function calls Robolytix API and you can use it in each of your processes in WinAutomation.
You must download demo process and then import it with main menu. Then you can use these functions.
- Download Robolytix Demo process.
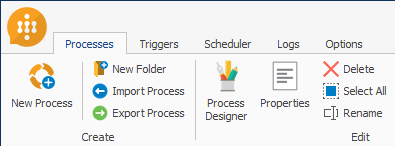
- Open WinAutomation and from the top menu select Import Process.
- Locate downloaded file on Disk and import the selected process.
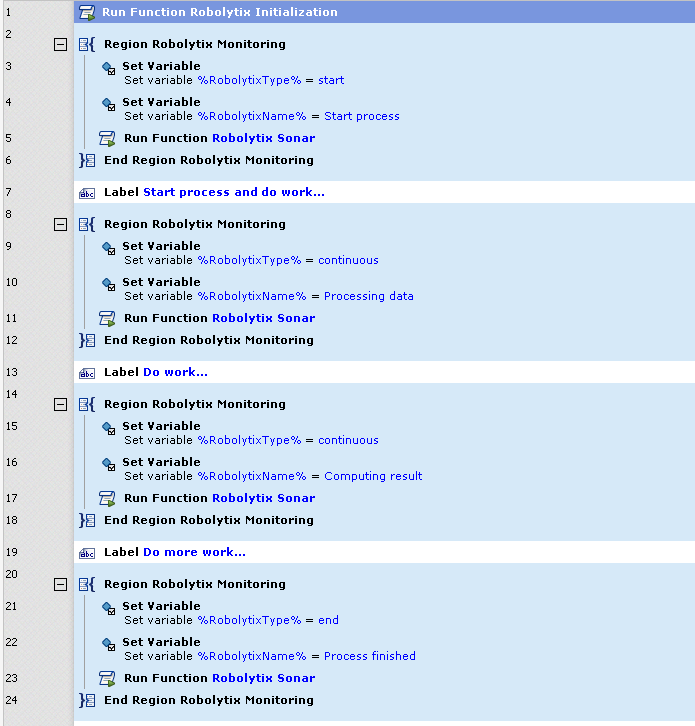
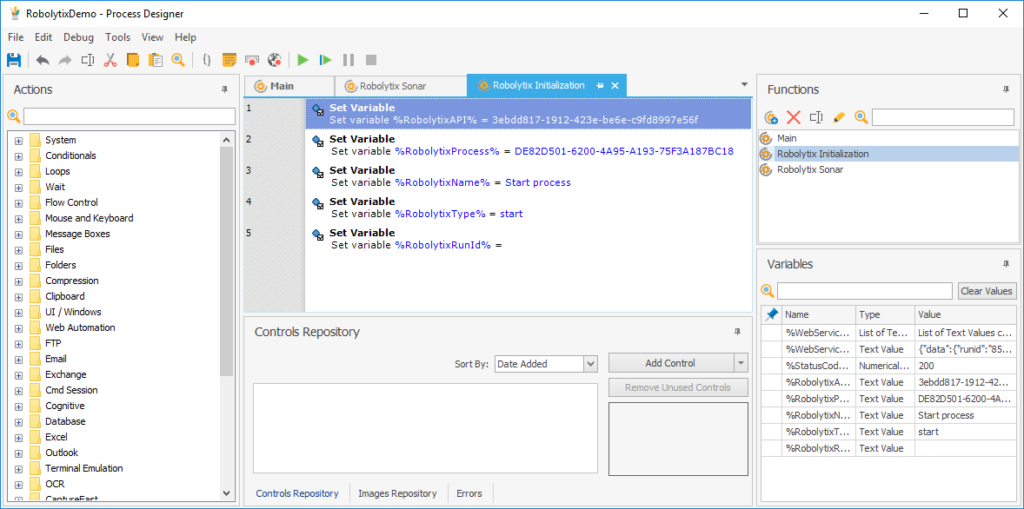
This example process contains example integration of Robolytix. It has two main function. Robolytix Initialization set up all important variables to default values. You have to set values of RobolytixAPI and RobolytixProcess variables.
Connect WinAutomation to the Robolytix
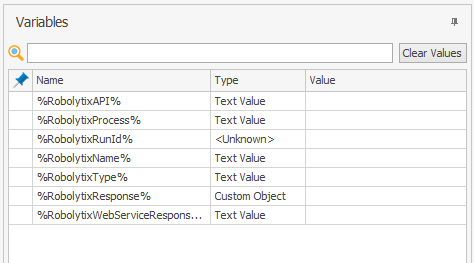
To connect your Robolytix account to WinAutomation, you must provide access to processes in your account. In WinAutomation, the best way to do it is by using variables with values identifying your account and process. There are three important variables in Variables View in example process:
- RobolytixAPI - Stores key for validating API requests
- RobolytixProcess - Identification of selected process in Robolytix
- RobolytixRunId - Identification of one process execution
You must obtain an API key for setting up the connection. To get your key, log into your Robolytix account and generate it in the settings menu. See detailed walkthrough Obtain API key.
- From the left navigation menu, select Settings. On the Settings page, select API keys in the menu and then click on the New API key button.
- Copy the unique key and set the value of RobolytixAPI to this key.

Now create your process in Robolytix and set value of RobolytixProcess to the process GUID. It is located in Settings ->Process -> General tab. You can create a new process in Robolytix by following the detailed guide Setting up processes in Robolytix.
Keep the default value of RobolytixRunId empty. The first Sonar in the process will set its value.
Use Sonars in WinAutomation
Process monitoring is performing by using Sonar checkpoints. The Sonars are at the beginning of the process, at all ends of the process, and at main branches in the process. Each Sonar embedded in the process contains the following settings:
- Name
The name of the Sonar should reflect the state of the process and clearly describe the surrounding steps in the process. - Process
Select a process from the list. The list contains all processes from your Robolytix account. If you don’t see your process in the list, make sure the process you want is already existing in your Robolytix account.
- Type
The type of Sonar determines its location within the process and must be one of the following values:
| Start | is the first checkpoint in the process.
| Continuous | are checkpoints anywhere in the process. Of course, more continuous Sonars means more advanced statistics.
| End | is the last checkpoint in the process. The process can have one or more “end” Sonars in different branches of the process.
| Error | is a special type designed to receive error information about process exceptions.
- Run identification
For advanced reporting, we recommend identifying each separate run process by a unique identifier. The unique identifier can be a variable generated by “start” Sonar and passed to all other Sonars in the process.
Add Sonar action to your processes
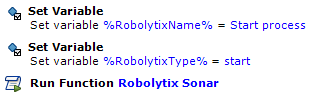
Now you can add Sonars to your processes. Each Sonar is defined by its name and type. At each step, you want to analyze, add Robolytix Sonar function, and set both variables, RobolytixName and RobolytixType.
The first step is to add Sonar with type start to the beginning of the task. Set input variable RobolytixName to clear description of the step. Then set the RobolytixType variable to start.
The second step is to mark the end of the process. Add or copy Sonar with Type parameter set to value "end" and set the Name parameter value.
Now you can add as many Sonars as you want. A good practice is to add Sonar to each important branch and each big loop in your process. Use type "common" for all further Sonars, or type "error" for handling errors.
Use and send custom data
It is possible to send to Robolytix custom data with each message. It is any data you want to add from your process. For example, you want to send ID of order from your eshop. We have prepared second Robolytix Demo Variables process with custom data. In this process, custom data are stored in RobolytixPayload variable. Formal specification about custom data is in our Robolytix API documentation.
For this purpose, we use variable with type Custom Object in WinAutomation. Each property of this object is parsed as new custom variable and send to Robolytix.

With this new property, additional data are sent with other Sonar data. In our Demo process, added properties are send to all remaining Sonars. If you want to send data with only one Sonar, you have to set RobolytixPayload to empty object with Set Variable action.
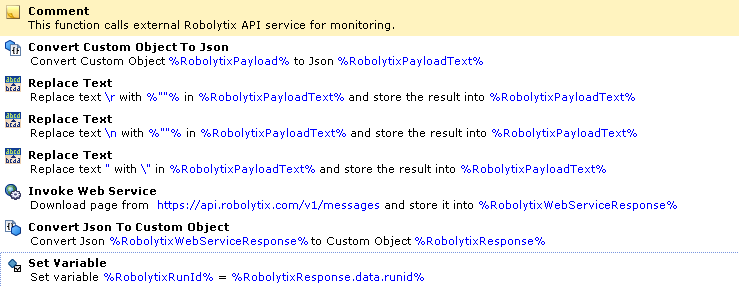
As you can see in the previous image, there are more action formatting variable with custom data. At first, variable is converted to JSON and then final string is cleaned for API.
Show your data in Robolytix

After proper process execution visit the Robolytix platform and check process statistics. It is possible to show all recent messages sent to the specified process. Go to Settings -> Processes menu and select the list of process messages.
If you have questions or need help with implementation please contact us at support@robolytix.com.
There is also a Support Forum for further questions.

